The recorder is a woodwind musical instrument that was popular as early as the 14th century. In the medieval and Renaissance periods, the recorder was consistently among the top three musical instruments of professional musicians and amateurs (along with the viol and the lute). It is still widely taught in schools today as it is an easy instrument to learn from a young age. The recorder is particularly associated with the music of the baroque era but also renaissance and modern eras. It is a prominent solo instrument in the baroque orchestra. Today, there are many sizes of recorders fitted to different pitched ranges. In this article, we will learn How to Play the Recorder In 10-Easy-Steps.
Table of Contents
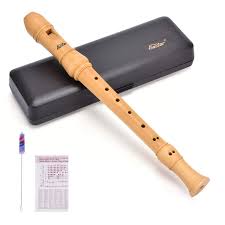
1. Choosing the Right Recorder:
Before you start learning how to play the recorder, it’s important to get yourself an instrument. There are a few different sizes which each refer to a different pitch range. The most common recorders include:
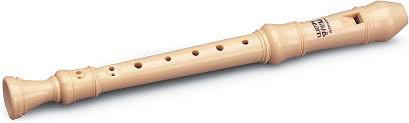
Soprano Recorder: It is also known as the descant recorder and is the most common type for beginners. It is pitched in C and has a bright, clear tone.
The Alto Recorder: Also called treble recorder, it is in the key of F, and usually played for the more advanced music. It has a richer and warmer sound compared to the soprano.
Tenor Recorder: Bigger and lower in pitch than the alto, also pitched in C another quality of the tenor recorder is the mellow full tone it produces.
Bass Recorder: The largest recorder in common use, pitched in F and provides a deep and resonant sound which is appropriate for ensemble or basso continuo playing.
For the beginner, the soprano recorder is generally recommended as the first choice because of its small size and because it is then comparatively easy to find your way about on other members of the family.
2. Understanding the Recorder:
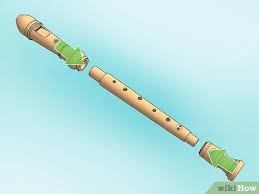
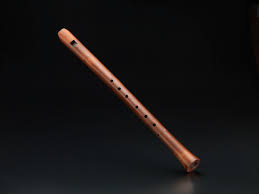
The recorder is composed of three main parts which are the headjoint, the body and the footjoint. Every part has its meaning in making sounds.
Headjoint: This is the part you blow. It has a mouthpiece and a windway that takes your breath to the labium (a sharp edge that splits your breath to make sound).
Body: The middle part of the recorder has the most finger holes. You change the note by covering and uncovering them with your fingers.
Footjoint: The lowermost piece of the recorder, which might have one or two extra holes for the little finger.
3. Holding the Recorder:
How you hold the recorder matters when it comes to playing it well. Here are a few tips to get started:
Left Hand on Top: Left hand should always be on top, covering the top holes. Right hand covers the lower holes.
Thumb Placement: The left thumb will cover the thumb hole in the back of the recorder. The right thumb will help support the recorder but will not cover any holes.
Finger Position: The position of your fingers are to be curved and relaxed and using the pads of your fingers, cover the holes completely. Do not apply too much pressure because it will strain you.
Posture:Keep yourself upright or stand with the shoulders in a relaxed position, not holding the tape recorder perpendicular to your body.

4. Producing Sound:
You make a sound on the recorder by controlling your breath and moving your mouth.
Breath Control: Blow softly into the mouthpiece as the recorder requires less air than most other wind instruments. Blowing too hard will cause a sound that is very shrill in pitch while a sound that is weak and indistinct will result if you do not blow hard enough.
Embouchure: Hold the mouthpiece of the recorder to your lips. Your lips should be firm around it, but not strained. Don’t puff your cheeks out.
5. Playing Your First Notes:
To play notes all you have to do is cover the holes as shown and blow gently. Here are some basic fingerings for a few of the first notes:
B: Put your left thumb on back hole and 1st finger of left hand on front hole 1.
A: Put index and middle fingers on the back thumb hole and 1st two holes on the front.
G: Cover the left thumb hole on the back of a G with your left thumb and the front holes with your index, middle and ring fingers.
Practise until every shade of feeling can be expressed in pure vowel sound.
6. Reading Music for Recorder:
Sheet music reading is a very important thing for musicians, and here are some absolute beginner basics.
Staff: Music is written on a STAFF, which consists of five lines and the four spaces between those lines. Music symbols are made into NOTES or other patterns that are read, interpreted, and played by musicians reading the staff.
Clefs: The treble clef is used for soprano and alto recorders, it looks like a stylized G and tells you the pitch of the notes on the staff.
Notes: Notes have different shapes that tell you how long they last. A whole note lasts for four beats, a half note lasts for two beats, a quarter note lasts for one beat, and so on.
Time Signature: It is written at the beginning of the staff and it tells you how many beats there are in a measure and what kind of note gets one beat.
7. Playing Simple Melodies:
Once you’re comfortable with the basic notes and reading musicyou can actually play some music.
Here are a few tips to help you play your first tunes:
Slow practice. As slow as possible, Start by playing the melody very slowly. Make sure each note is accurate and clear.
Use a Metronome:You know drummers are meant to have good rhythm but fret not if that’s not you – it’s a learned skill. A metronome will keep you in time as you play. Begin at a low speed and rise it when you’re ready.
Phrasing: Watch the phrasing in the music. This is essentially playing a group of notes together smoothly and knowing where to breathe in the music.
8. Advanced Techniques:
With proficiency in the strings, you can begin to learn difficult techniques that will help you improve your playing.
Articulation: This is how you start and stop notes. You tongue notes by starting them with the tip of your tongue. You can slur notes (slide between notes without tonguing).
Dynamics: Change the volume at which you are playing to add expression. Getting louder is called “crescendo”, and getting softer is called “diminuendo”.
Vibrato: A slight fluctuation in pitch that adds warmth and expression to your playing. It can be achieved by changing the pressure of your breath or by using finger techniques.
9. Caring for Your Recorder:
Taking good care of your recorder and performing regular maintenance will help to keep it in top condition and to produce the best sound.
Cleaning: After each practice lesson, clean your recorder with the help of cleaning rod by detaching it in pieces ( 3 pieces or 4 pieces ). After that use a cloth for drying it. In case your recorder is made-up of wooden material then no need to make it wet, the better option would be to remove its moisture while playing so that it produces a good music sound.
Storage: When not in use, make sure to store your recorder in a protective case and prevent dust or dirt from getting into it. Avoid extreme temperatures and humidity.
Regular Maintenance: Make sure to inspect for cracks or any damage at regular intervals. Occasionally, wooden recorders may need to be oiled, to ensure that the wood is kept in good condition.
10. Resources for Further Learning:
There are so many options to continue learning and improving your recorder playing.
Method books for recorders: Find a beginner and an intermediate recorder method book that usually includes exercises, scales, and pieces.
Online Tutorials: Several websites and YouTube channels provide recorder lessons and tutorials for free.
Recorder Ensembles: Becoming a member of a recorder ensemble or group will give you experience playing along with others.
These are the steps you should follow.